It's OK to be Materialistic
Reinforced Concrete
Corrugated Steel
ABS Plastic
Ductile Iron
PVC
The above are the materials that C3D gives you to describe the pipes inside your pipe network. However, as most of you already know, in the real world we use a much wider variety of materials in our projects.
Current workarounds to having your labels display properly, even though the actual material of the pipe is incorrect:
1.) Edit the description of the pipe inside of your part list.
Then you can simply pull the description component inside your your label.
2.) Hard code, or type in a piece of text inside your label.
Both of the above ways are not linked to the pipe model. So if the material or pipe size where to somehow change, said change would not be reflected in the label.
So how can you add more materials to your current list and have them update dynamically. Easy...just type in a new material!!! That's it!
The below process also steps you through how to create a new part family to better organize your new materials.
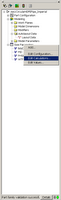
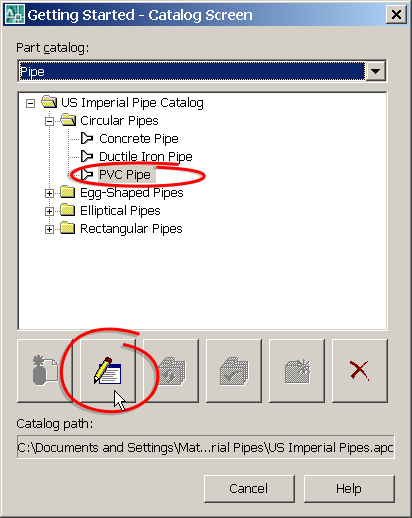
Step 1. Launch partbulder. Type it in or select it from the pipes pull down menu
Step 2. Select an existing part family to modify.
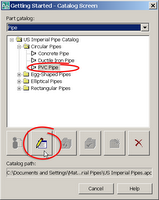
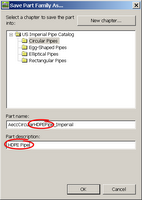
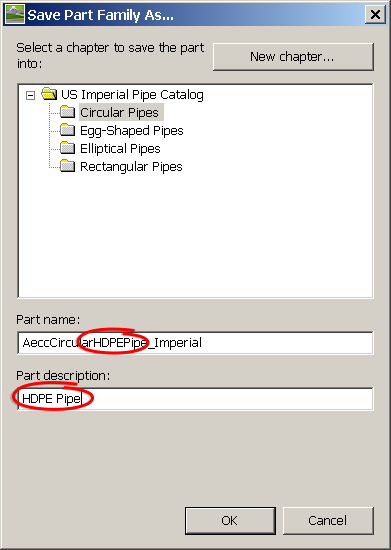
Step 3. Save part family as..
Step 4. Rename the new family
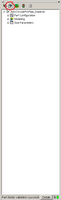
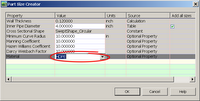
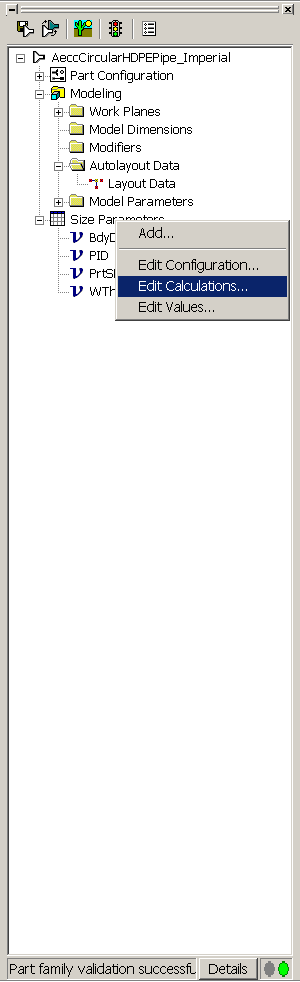
Step 5. Edit the calculations
Step 6. Notice the name that is being used in the PrtSN (Part Size Name) Column.

Double click on one of the cells under the PrtSN column to bring up the Calculation Assistant. Here you can edit the name from PVC to whatever, in this case HDPE.

End result:

Step 7. Validate and save the part family

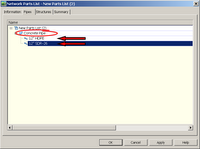
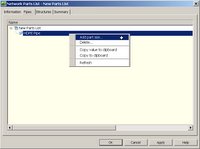
Step 8. Create a new parts list and add a family.

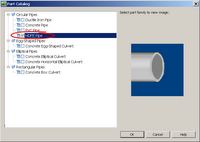
Step 9. Choose the freshly created part family.
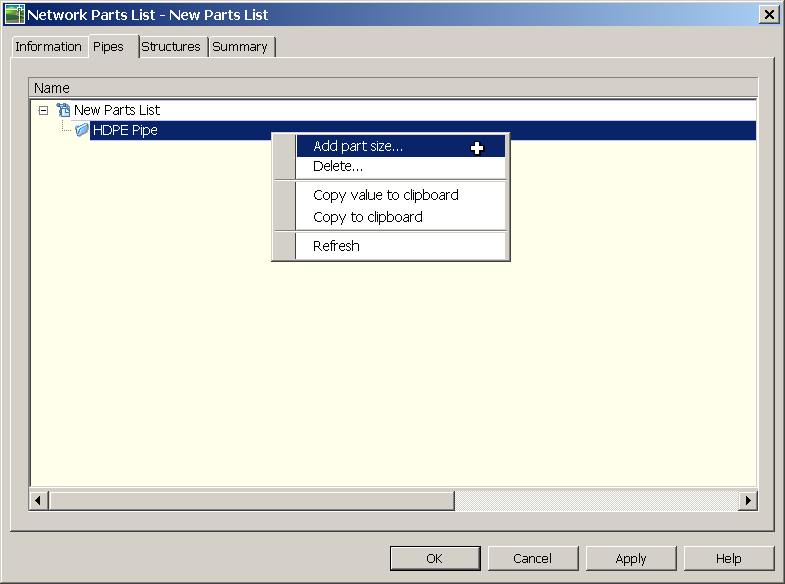
Step 10. Add a part size
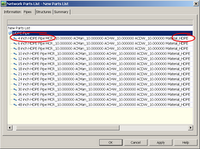
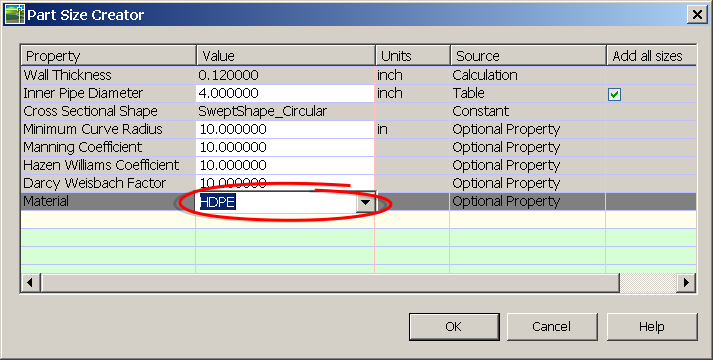
Step 11. Now we should be at a dialog box that looks familiar to everyone. This is where we choose our part size and it's also where we make sure our parts are going to referencing the correct material (See Dana's blog here). But what if we want to use a material other than the five listed...no problem, just click inside the cell and type in a new pipe material.
After choosing your pipe size(s), OK out of the dialog box.
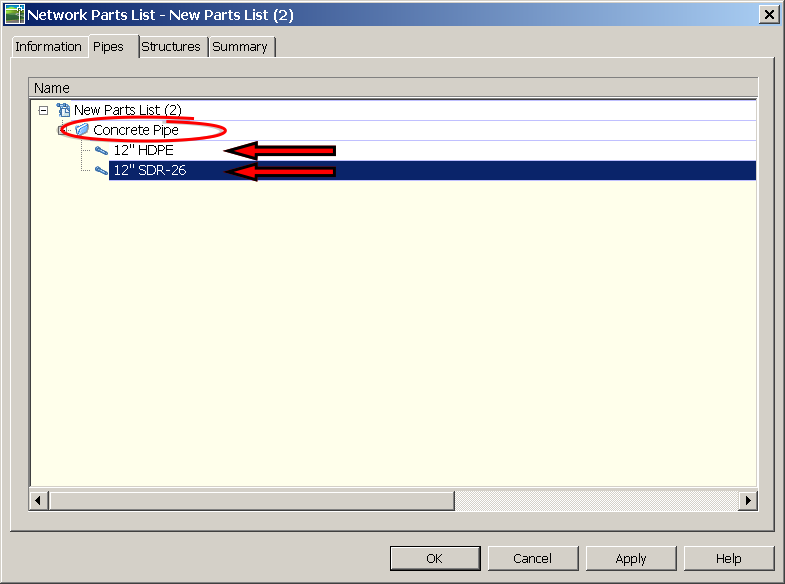
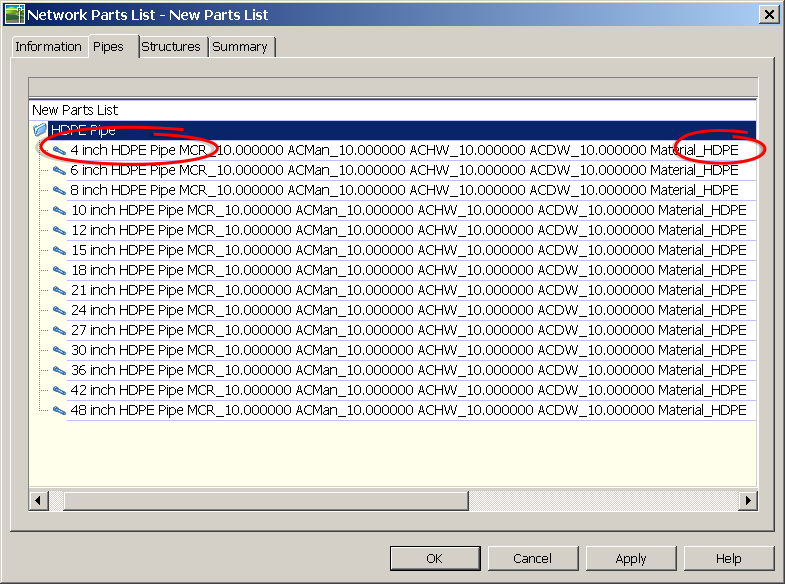
End result:
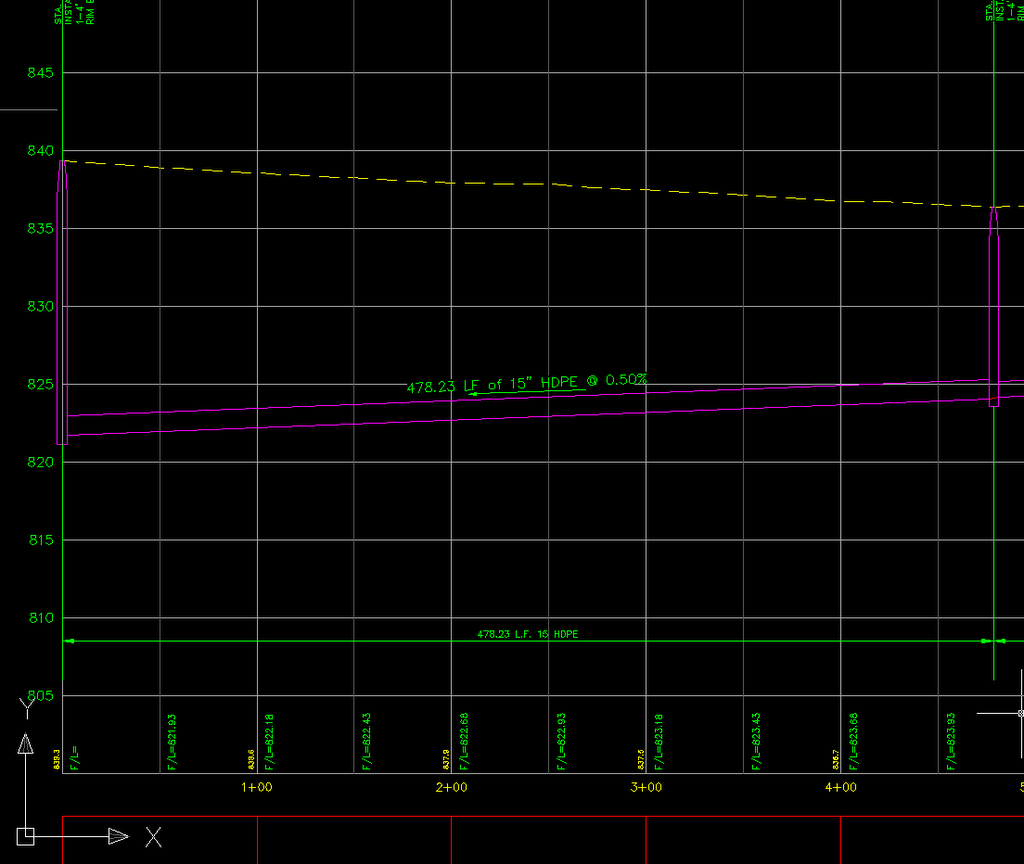
So what does this mean? I no longer have to pull the description of my pipe in my label (which isn't even possible when dealing with a pipe band), instead I can pull the Dia. and Material and achieve the same result. Except this time, the label is dynamic to part size and material.
Final Product:
-Enjoy
p.s. So yeah, I know it's been a while since I posted. I will try to post a little more regularly from now on to make it worth people's time to check out my posts.
Corrugated Steel
ABS Plastic
Ductile Iron
PVC
The above are the materials that C3D gives you to describe the pipes inside your pipe network. However, as most of you already know, in the real world we use a much wider variety of materials in our projects.
Current workarounds to having your labels display properly, even though the actual material of the pipe is incorrect:
1.) Edit the description of the pipe inside of your part list.
Then you can simply pull the description component inside your your label.
2.) Hard code, or type in a piece of text inside your label.
Both of the above ways are not linked to the pipe model. So if the material or pipe size where to somehow change, said change would not be reflected in the label.
So how can you add more materials to your current list and have them update dynamically. Easy...just type in a new material!!! That's it!
The below process also steps you through how to create a new part family to better organize your new materials.
Step 1. Launch partbulder. Type it in or select it from the pipes pull down menu
Step 2. Select an existing part family to modify.
Step 3. Save part family as..

Step 4. Rename the new family
Step 5. Edit the calculations
Step 6. Notice the name that is being used in the PrtSN (Part Size Name) Column.

Double click on one of the cells under the PrtSN column to bring up the Calculation Assistant. Here you can edit the name from PVC to whatever, in this case HDPE.

End result:

Step 7. Validate and save the part family

Step 8. Create a new parts list and add a family.

Step 9. Choose the freshly created part family.

Step 10. Add a part size
Step 11. Now we should be at a dialog box that looks familiar to everyone. This is where we choose our part size and it's also where we make sure our parts are going to referencing the correct material (See Dana's blog here). But what if we want to use a material other than the five listed...no problem, just click inside the cell and type in a new pipe material.
After choosing your pipe size(s), OK out of the dialog box.
End result:
So what does this mean? I no longer have to pull the description of my pipe in my label (which isn't even possible when dealing with a pipe band), instead I can pull the Dia. and Material and achieve the same result. Except this time, the label is dynamic to part size and material.

Final Product:
-Enjoy
p.s. So yeah, I know it's been a while since I posted. I will try to post a little more regularly from now on to make it worth people's time to check out my posts.
posted by Matt Castelli at
2:51 PM
![]()
![]()

1 Comments:
Thanks for the great help in this. I am trying to make my pipes label "D.I." instead of "ductile iron" and cannot get the Network Parts List editor to remember this when I manually type it in for material value (as outlined in your step #11). I type it, hit ok, close it and then reopen it and it is gone. It is the same for any text, even "HDPE," so periods are not an issue. Any ideas?
By Anonymous, at 1:04 PM
Post a Comment
<< Home